Wood testing and voicing
Click to enlarge photos. Click on the enlargement to magnify them.
Obviously a great many very good guitars
have been made, and are still being made,
without the aid of computers and audio
analysis equipment. I have a lot of respect
for “intuitive” builders who have developed
their sensitivities to the point that they can
tell, by flexing and tapping, when a
soundboard is the right thickness, or when a
brace is shaved down to the right height.
I came under the influence of engineers at a
tender age, and it works for me to use an
engineering approach to selecting wood and
voicing the instrument. This is not science as
I was taught to practice it. There is neither
time nor money for that. I use obsolete
equipment, donated by friends, some shop
built equipment, and one good software
program to test my wood for it's acoustic
properties, and to check my backs and
soundboards as I move through the various
stages of construction.
But make no mistake ~ it's the thrill that the
player gets from playing an instrument that is
the measure of the success of any method of
guitar construction. I'm looking for that
exciting sound and responsiveness in a guitar
that makes me want to keep on playing it. It's
what master luthier Jeff Elliot calls "allure",
and there is no need for any test equipment to
measure it. Flamenco is a very intuitive art,
and all thoughts of a resonance's position in
the audio spectrum go away, as soon as my
thumb hits the sixth string.
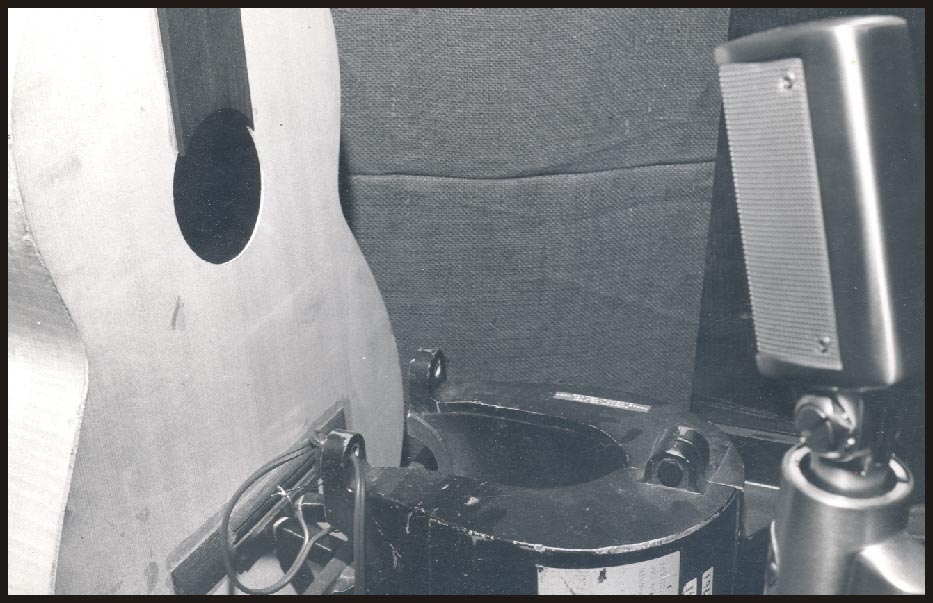
Experimental guitar under test
in my shop in Claremont in 1964
in my shop in Claremont in 1964
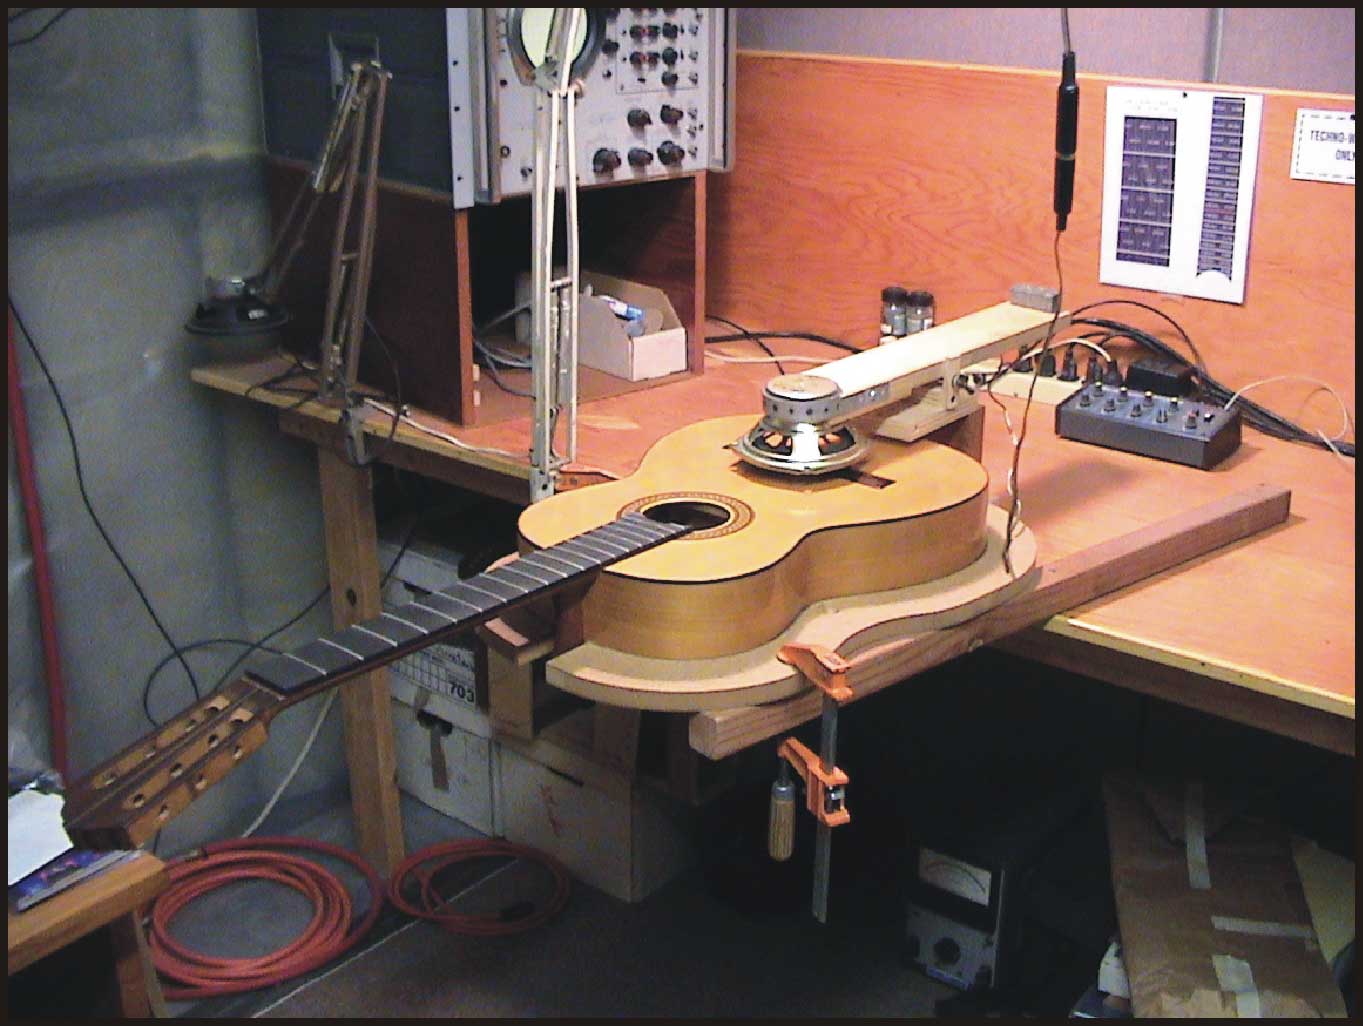
Guitar getting final resonance check
before the back goes on ~ 2005
before the back goes on ~ 2005
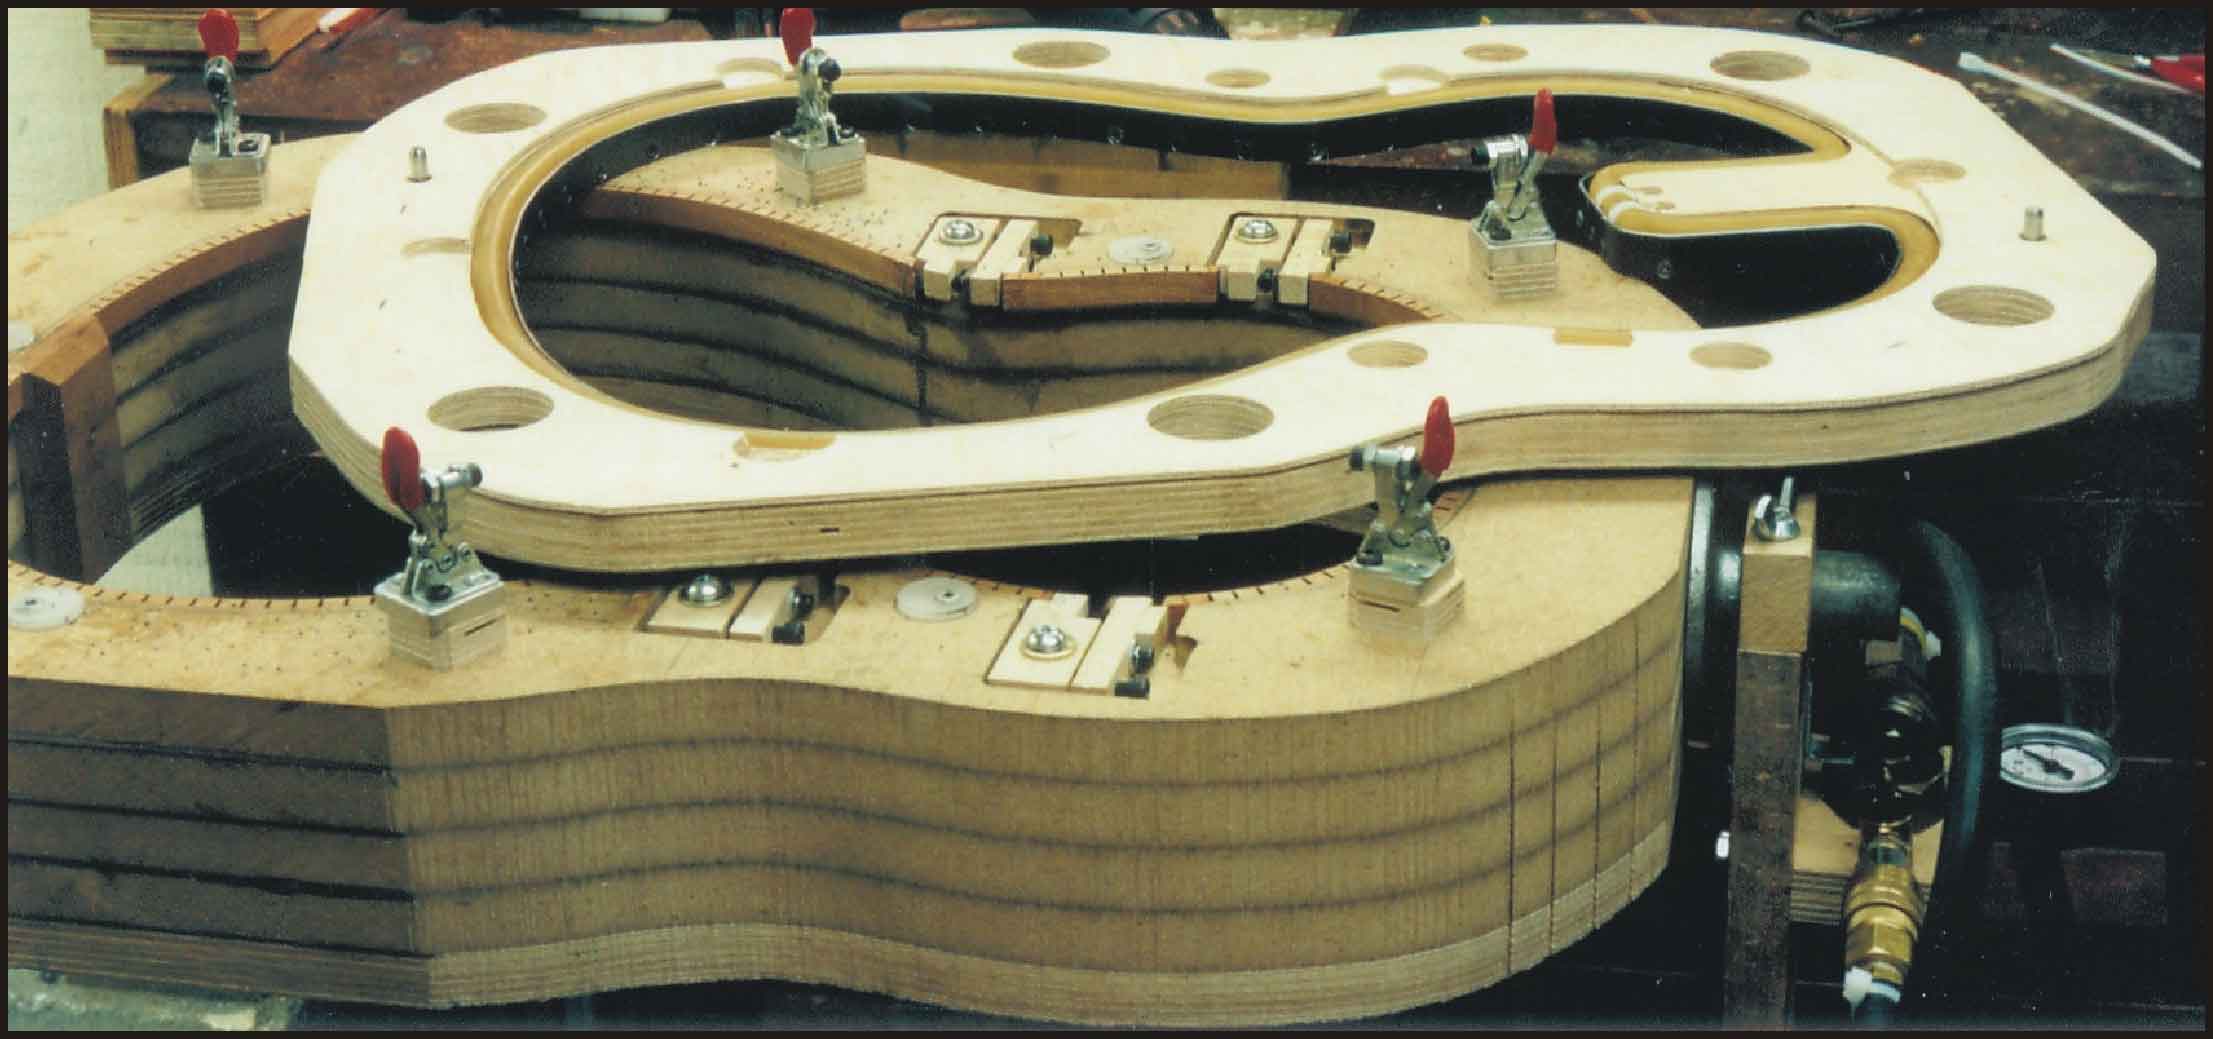
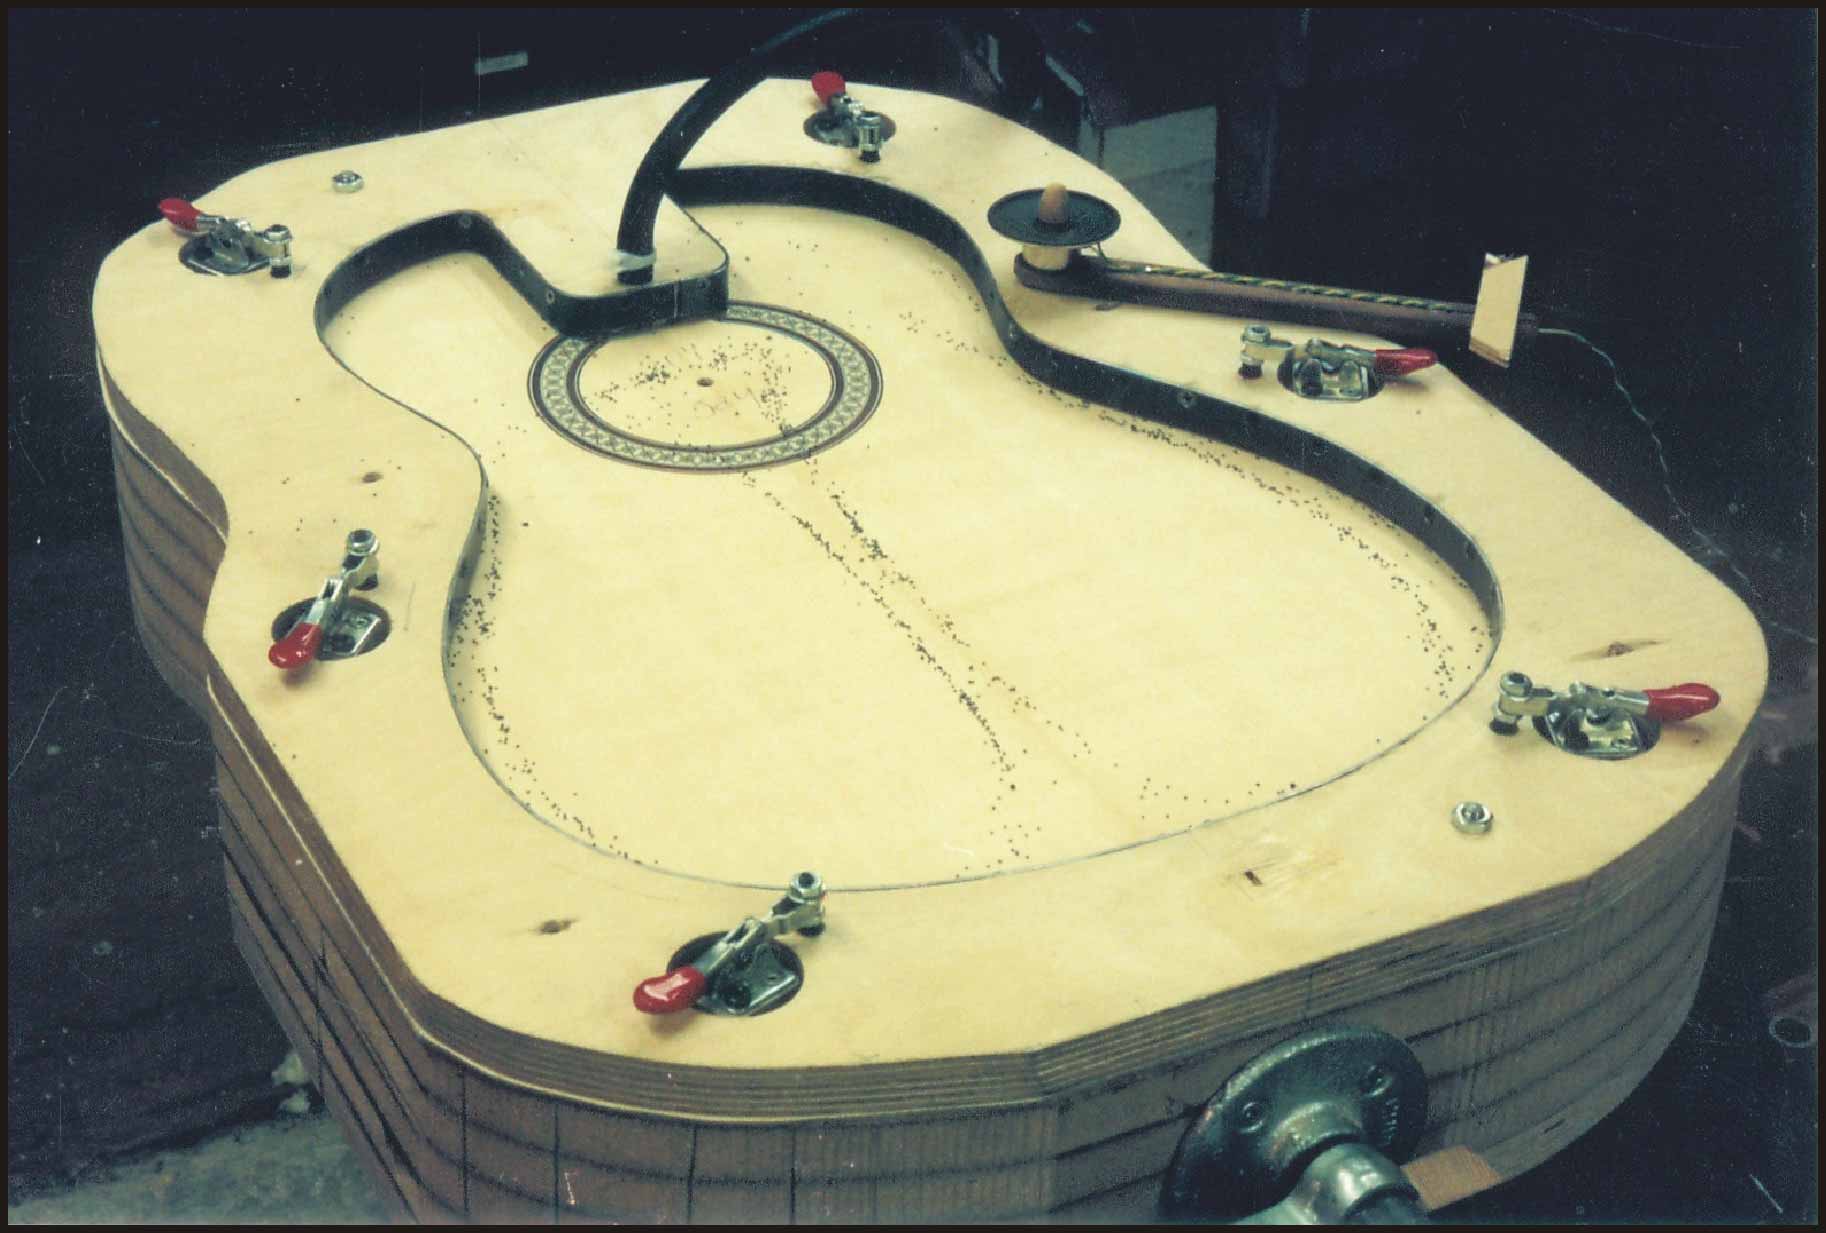
My "voicing form" replicates the interior cavity
of the sound box, and allows me to clamp a
top and/or back for resonance testing.
of the sound box, and allows me to clamp a
top and/or back for resonance testing.
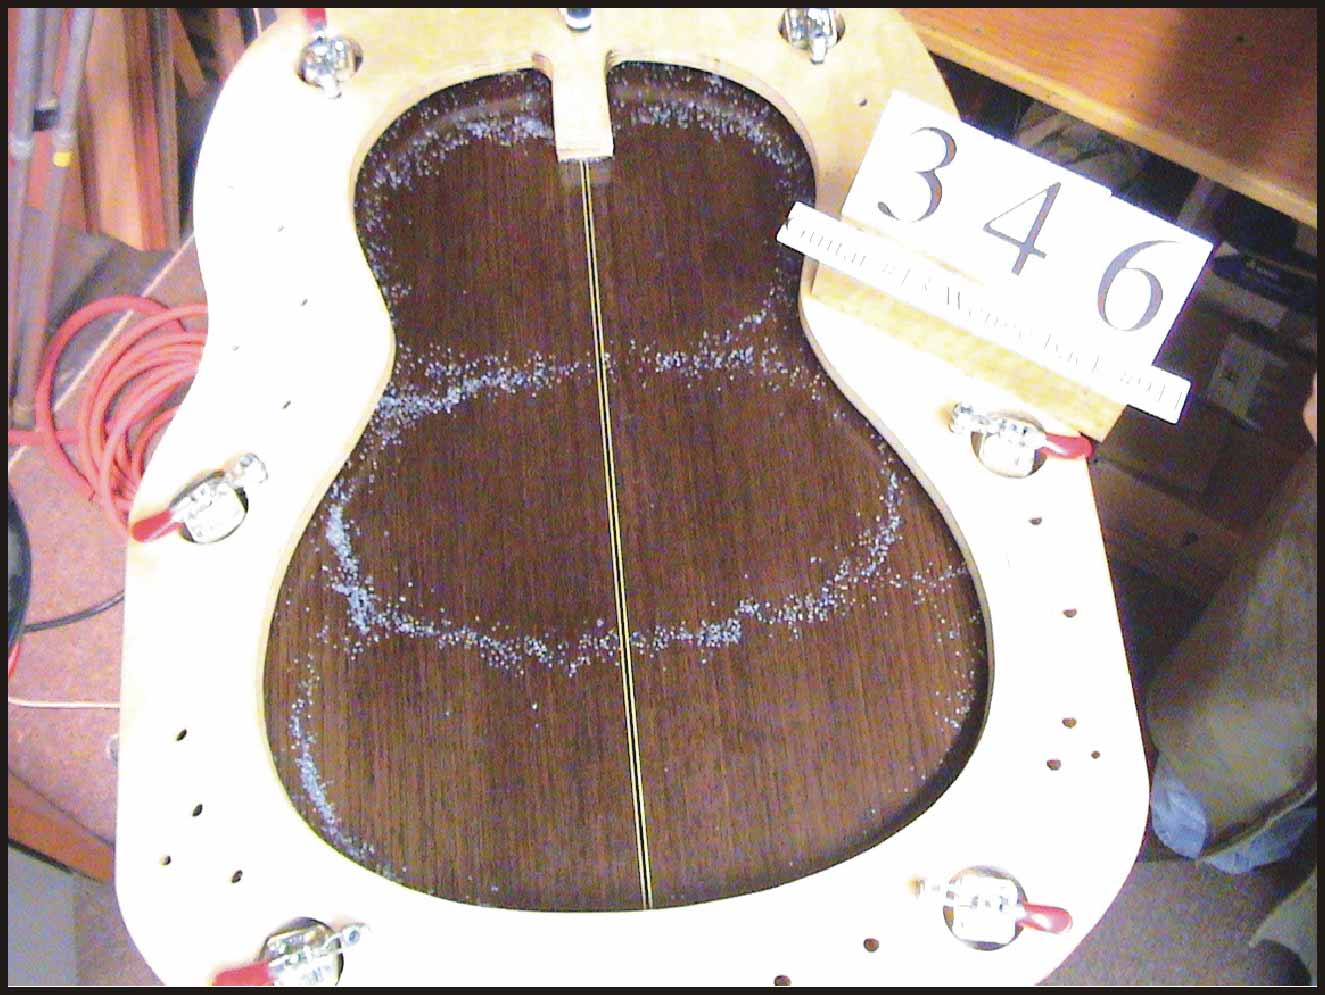
Back having the height of its braces checked.
This mode is called the "long tripole"
This mode is called the "long tripole"
Soundboard without braces gets its initial
resonance test on the voicing form. This is the
point where I decide on the thickness.
resonance test on the voicing form. This is the
point where I decide on the thickness.
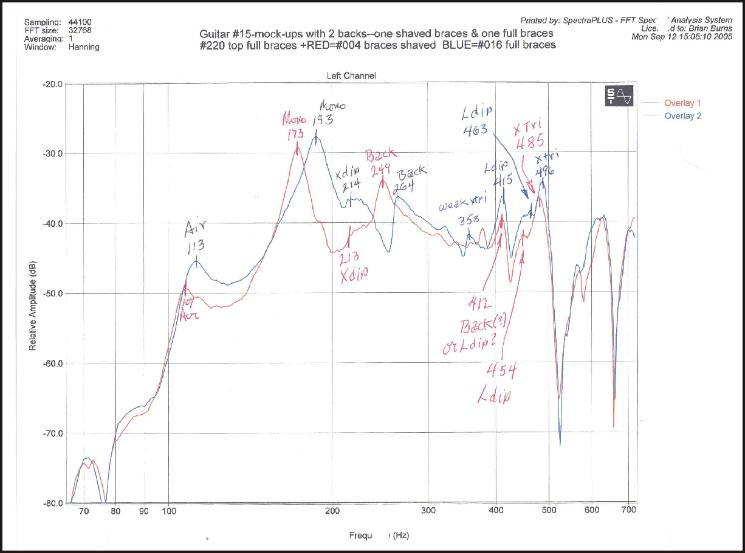
Print-out of "response curves" from Spectra Plus, a wonderful audio analysis program
that works on my PC. I use this program for testing backs and soundboards by
themselves, as well as partially assembled and finished instruments. It really points out
the subtleties. These graphs compare the main resonance locations before and after
shaving the back braces.
The range covered in this graph is from just below the open 6th string to about the
14th fret of the first string. The program will display as much, or as little, of the audio
spectrum as you want to see.
Wood testing ~ click to enlarge photos.
Click on the enlargement to magnify them.
Click on the enlargement to magnify them.
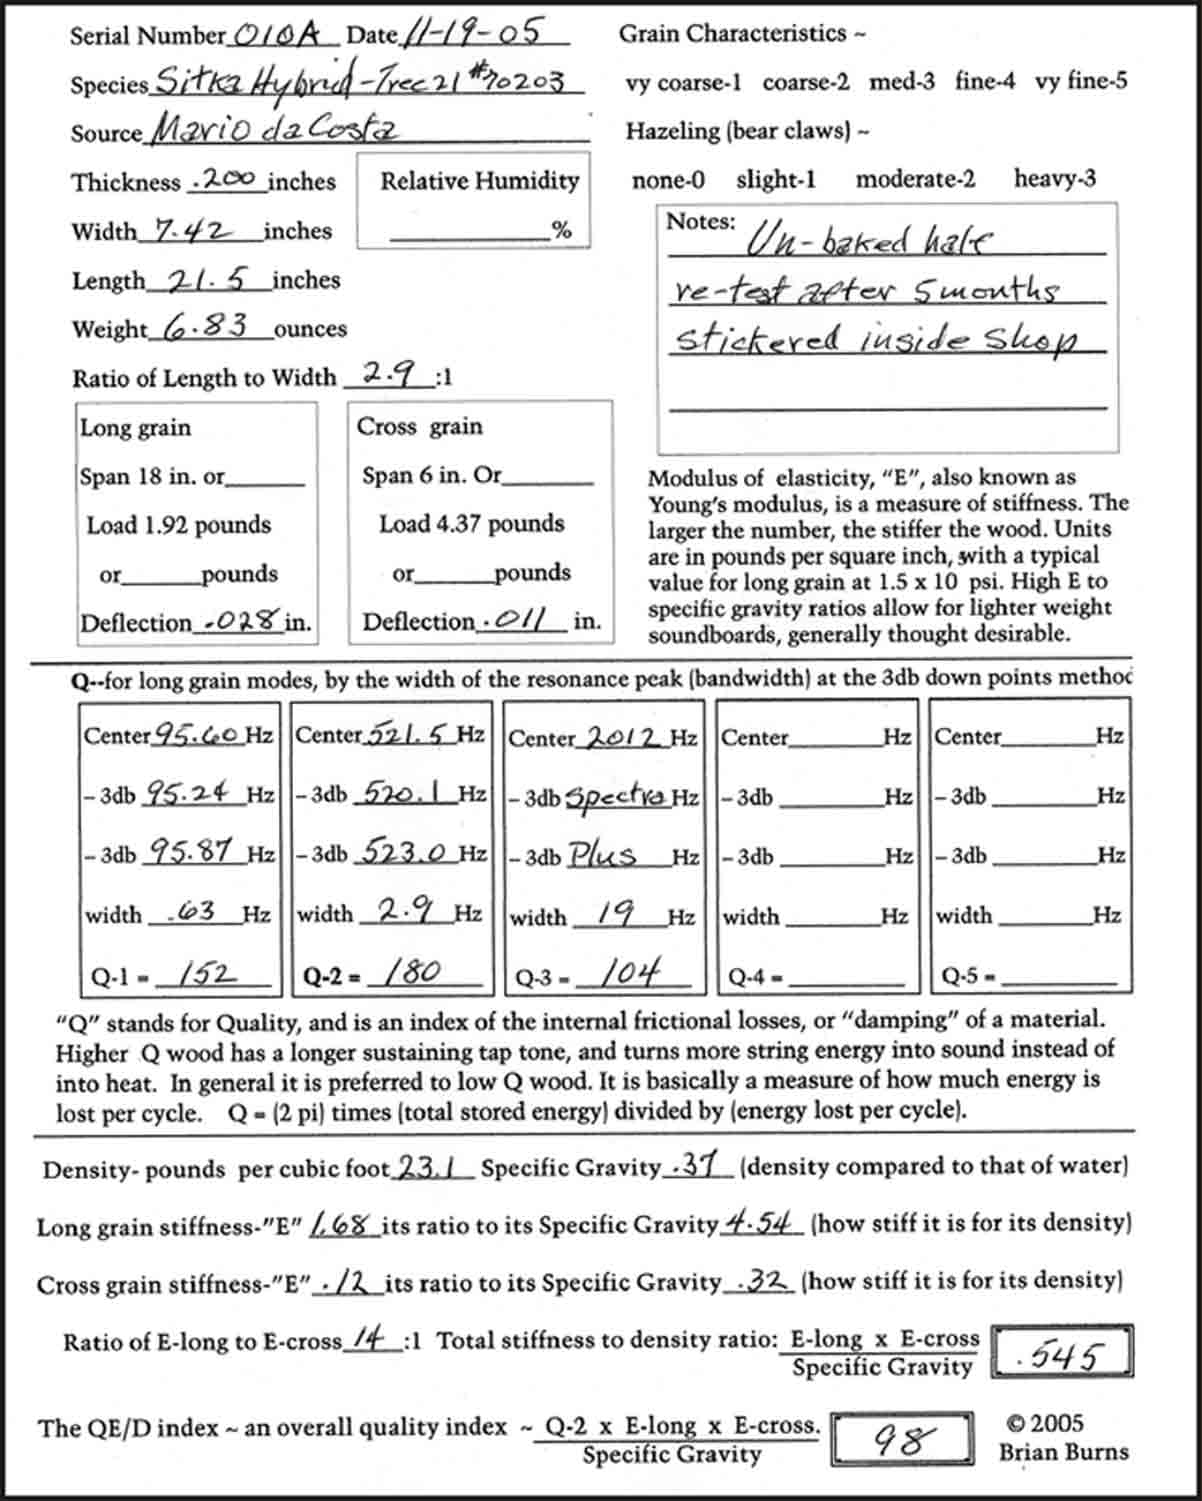
To say that I'm fussy about the wood that I use is to
really understate the case. I test all my backs and
soundboards for long grain and cross grain
stiffness, density, and internal damping (Q). I've
accumulated a lot of data over the years, and I'll
only use wood that meets my specifications for
excellence.
There is some good evidence that, for nylon string
guitars, tone quality is really dependent on wood
quality, particularly for getting great treble.
If you're interested in wood testing, contact me,
and I'll send you the handout from my talks at the
Healdsburg Guitar Festivals.
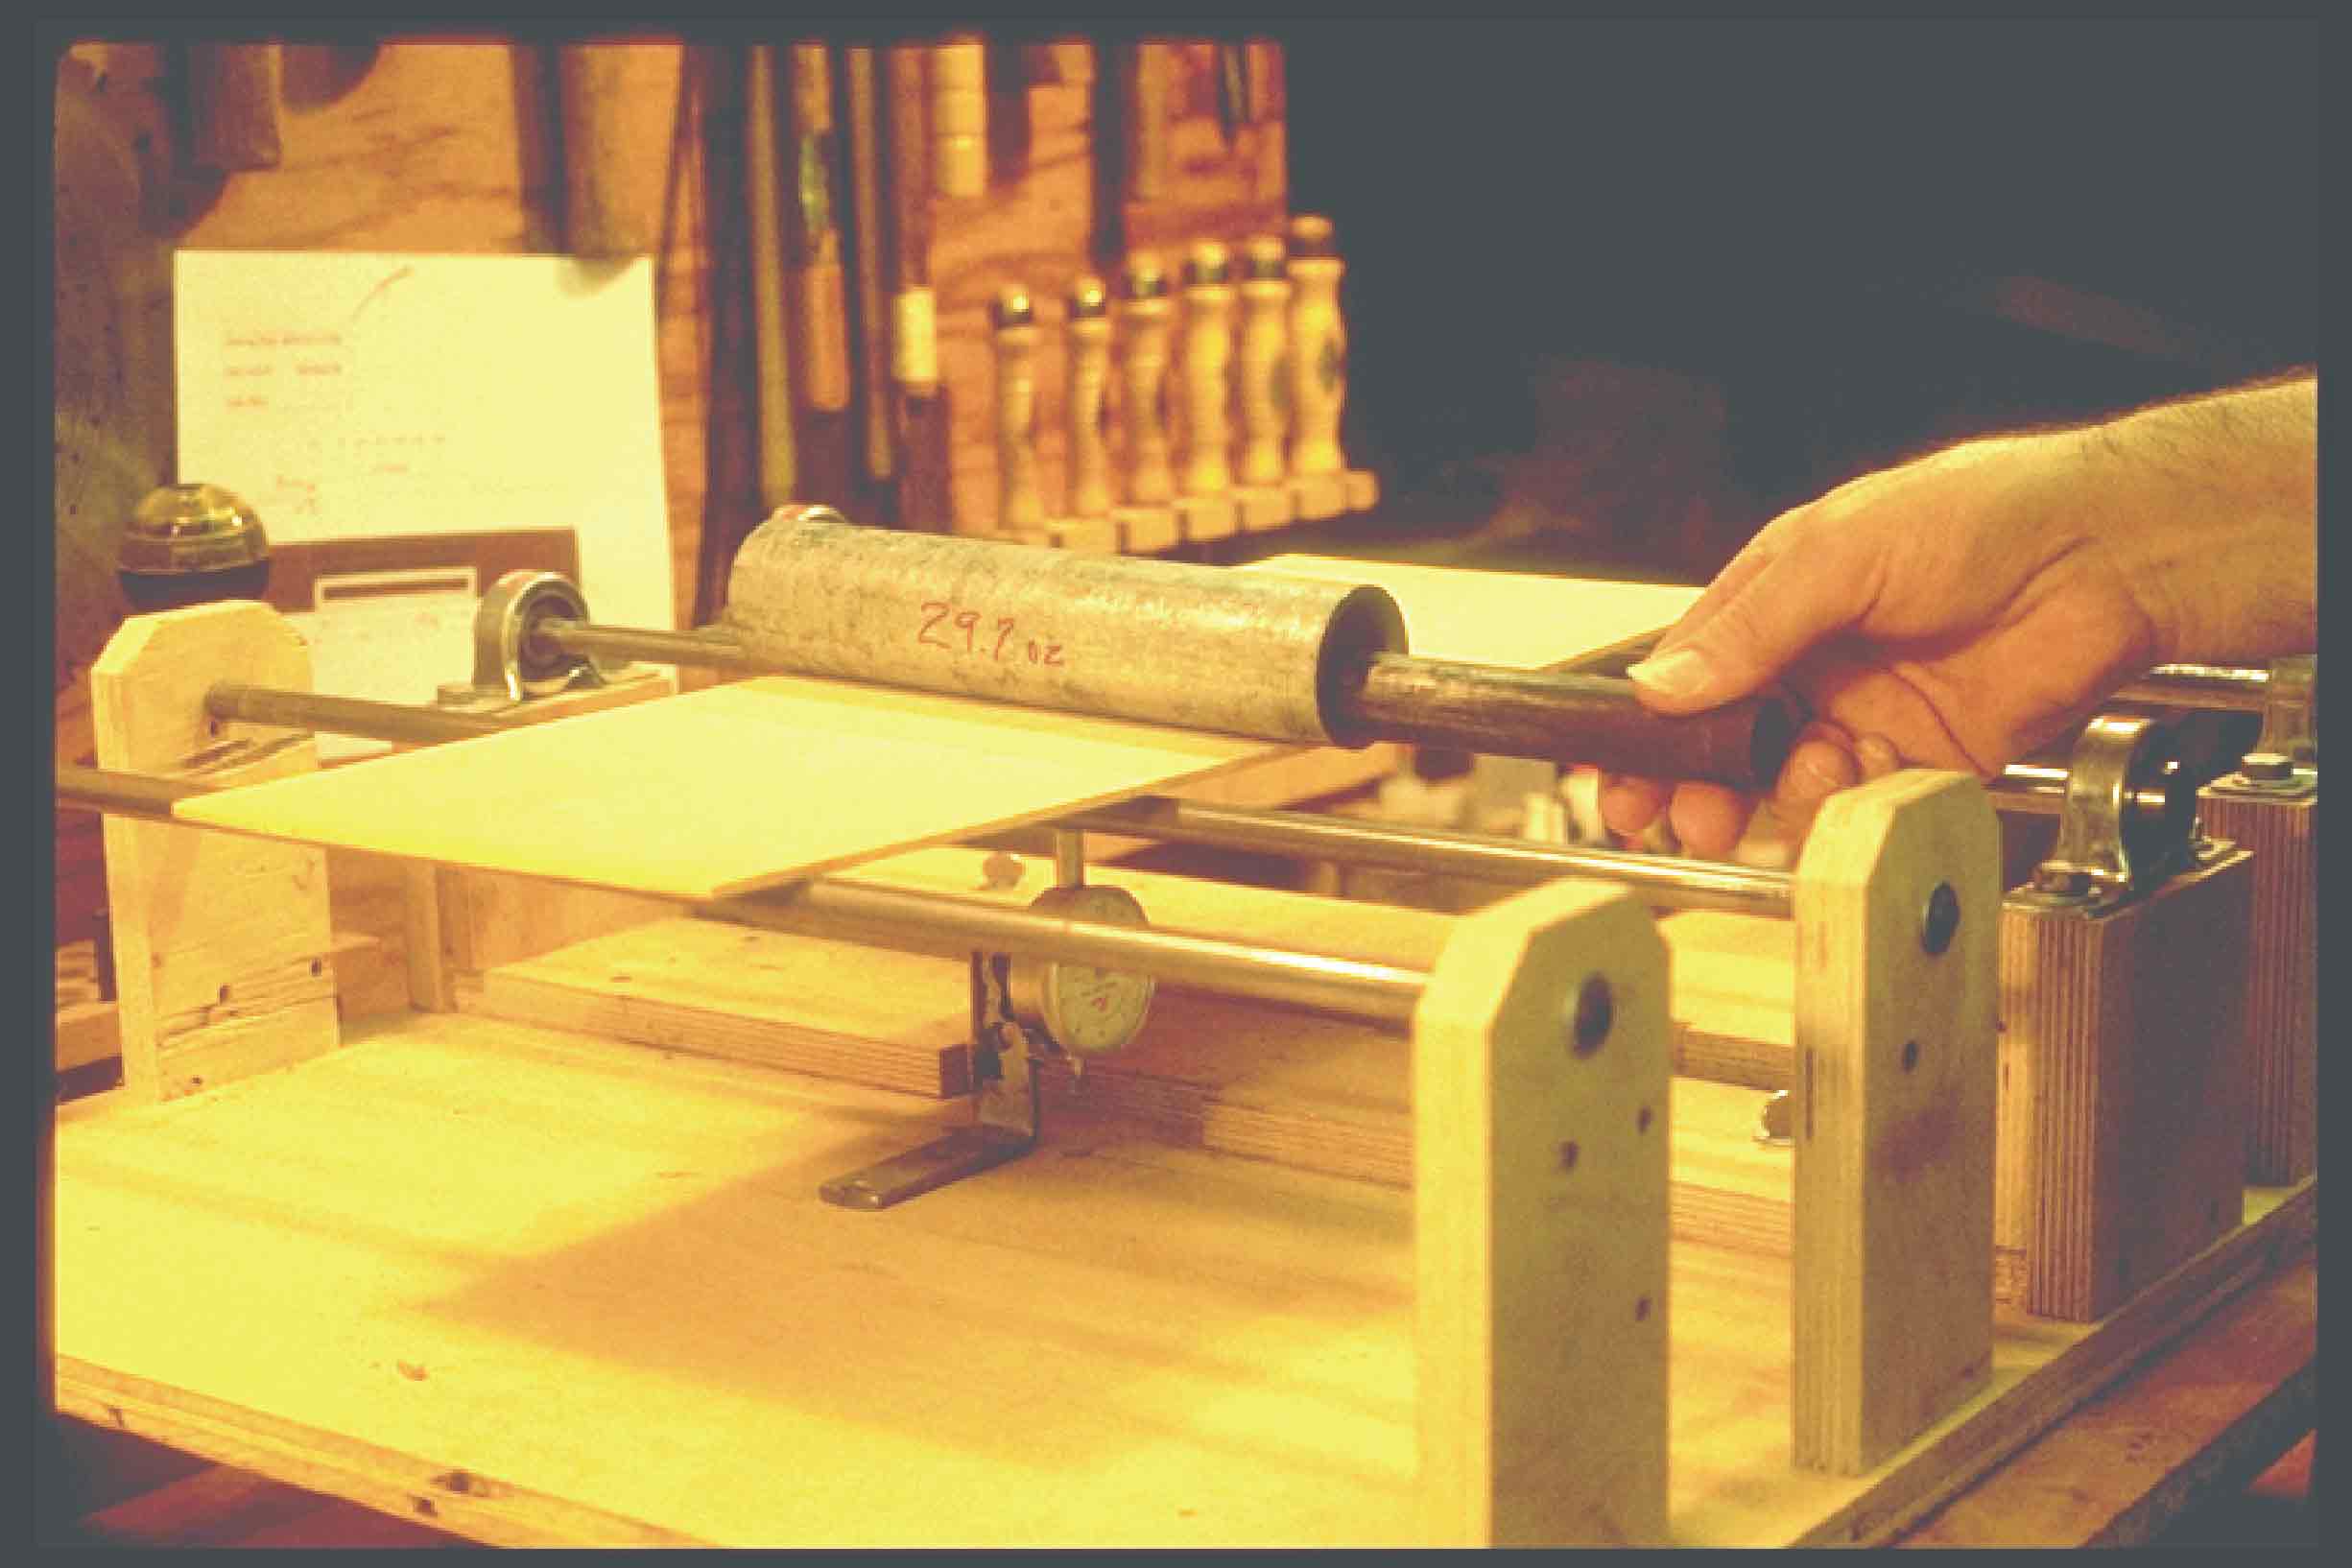
Deflection testing for measuring stiffness
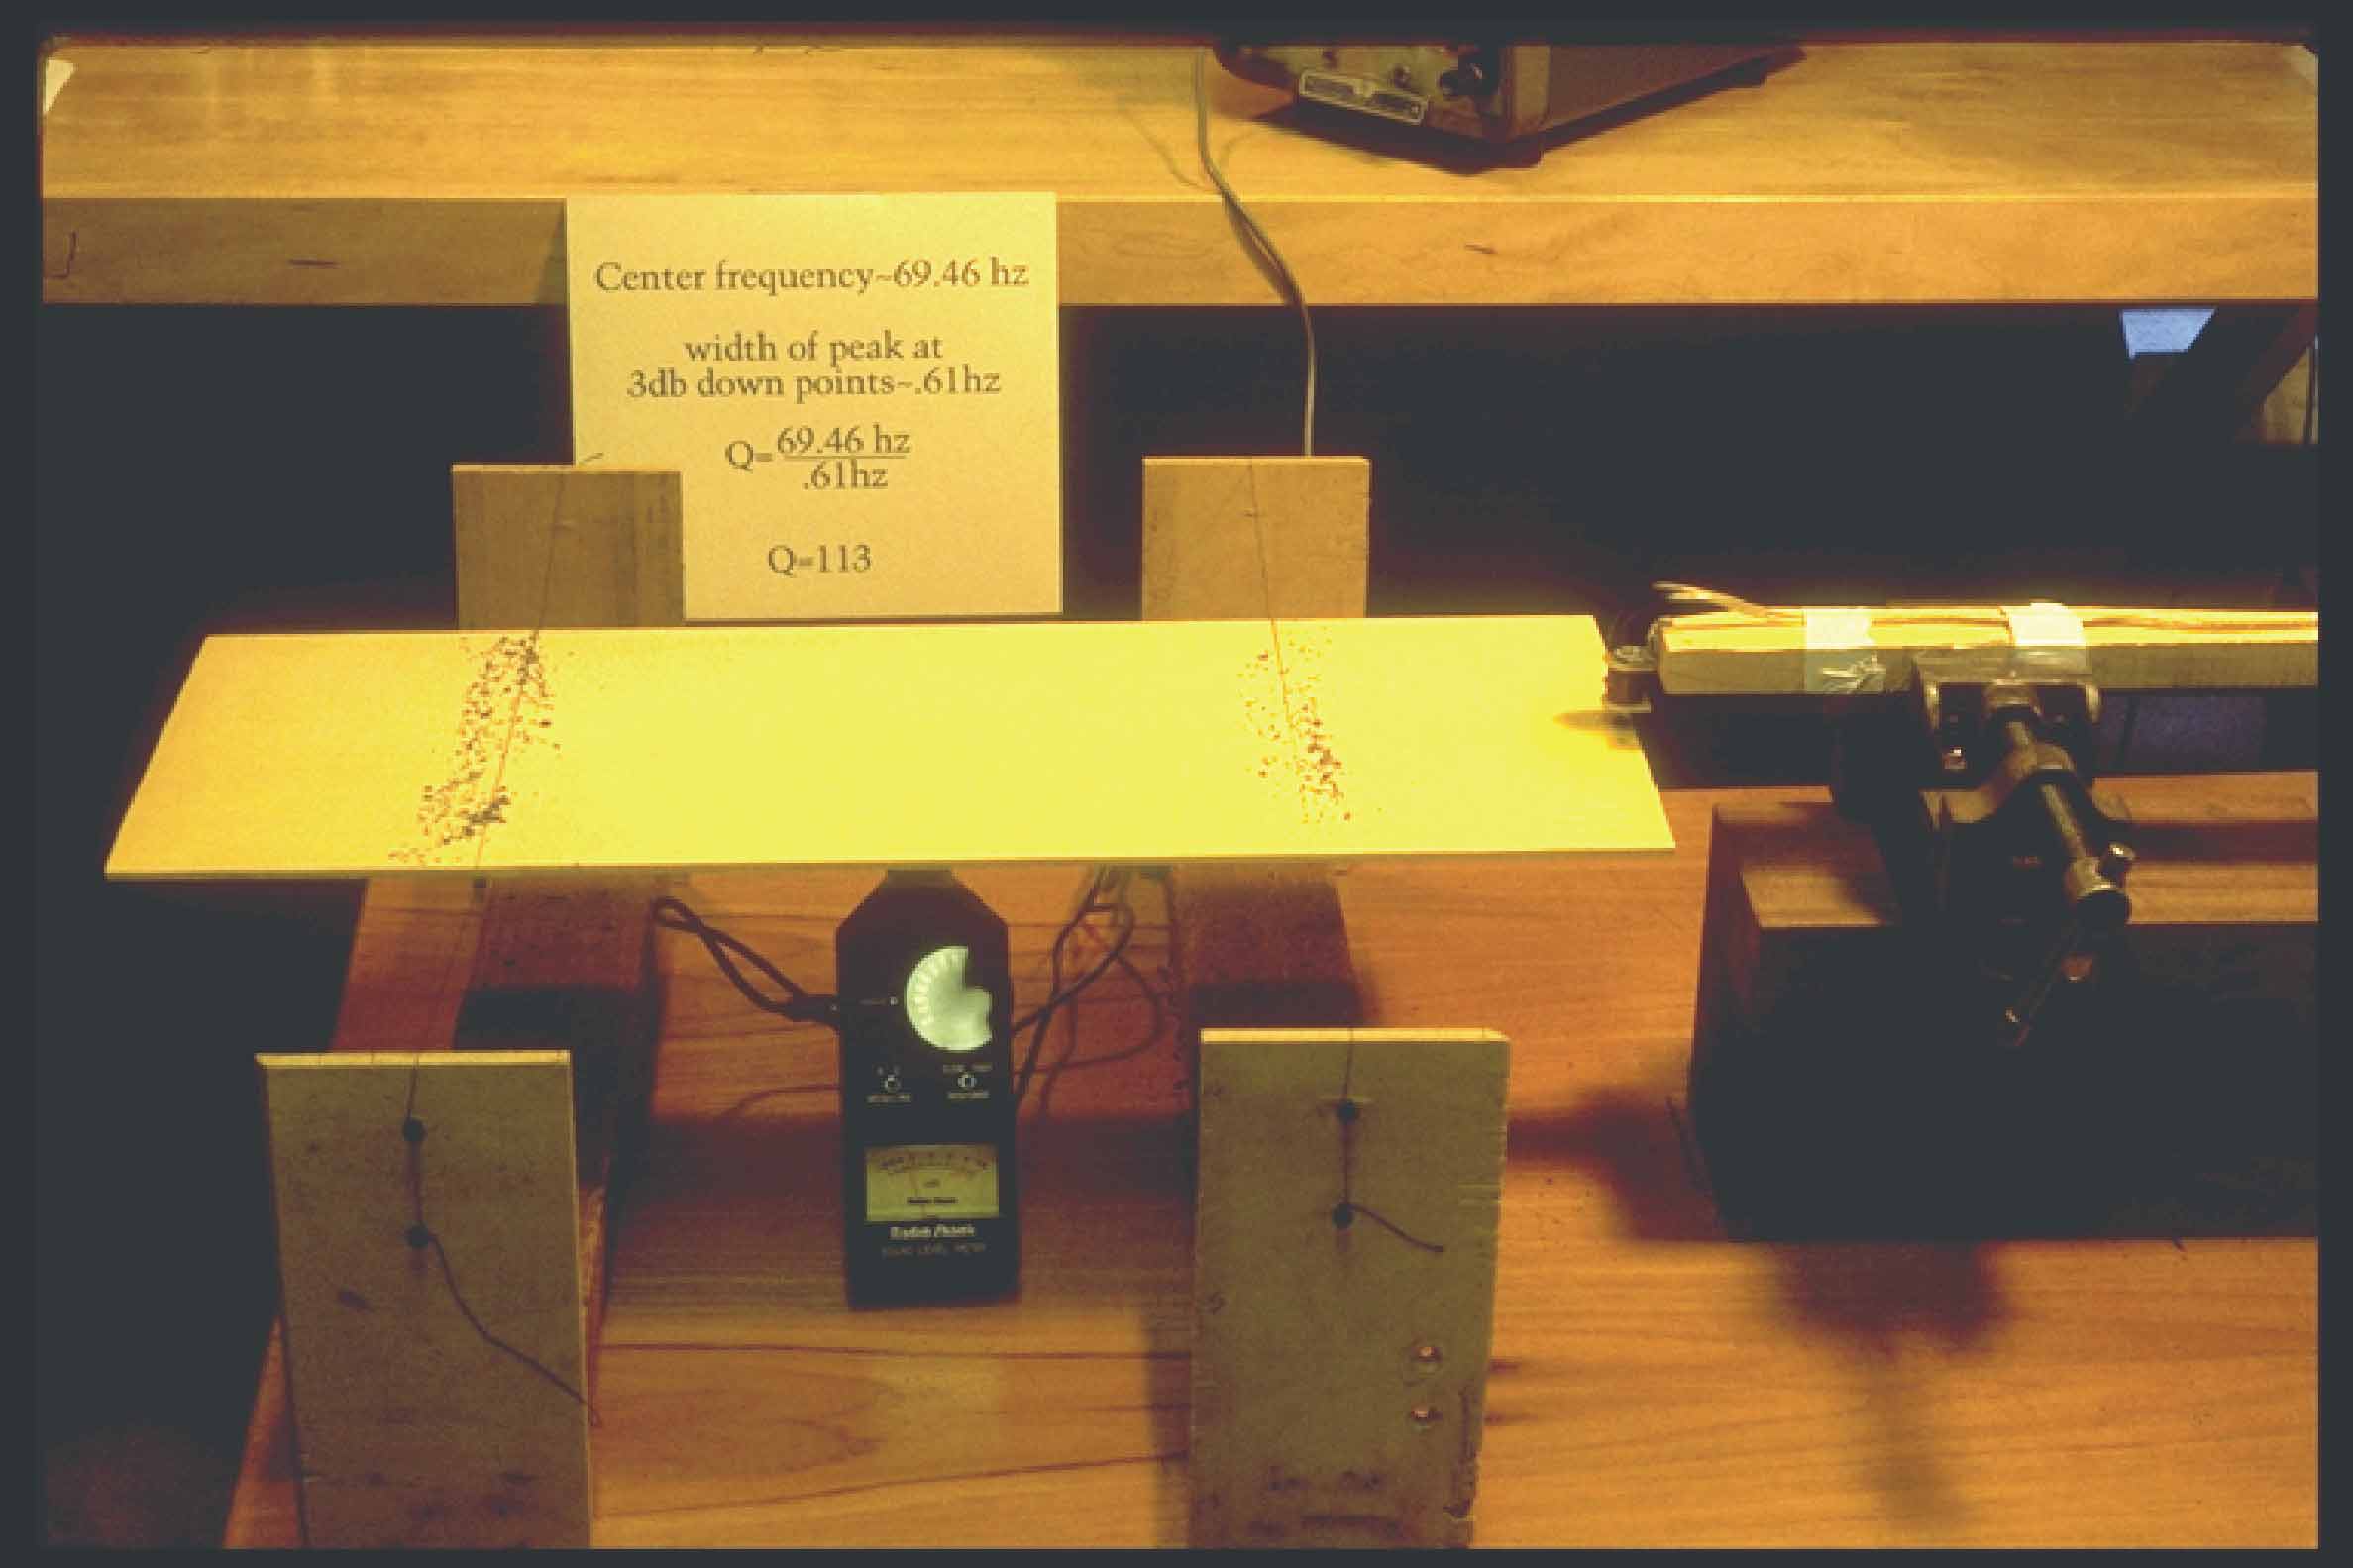
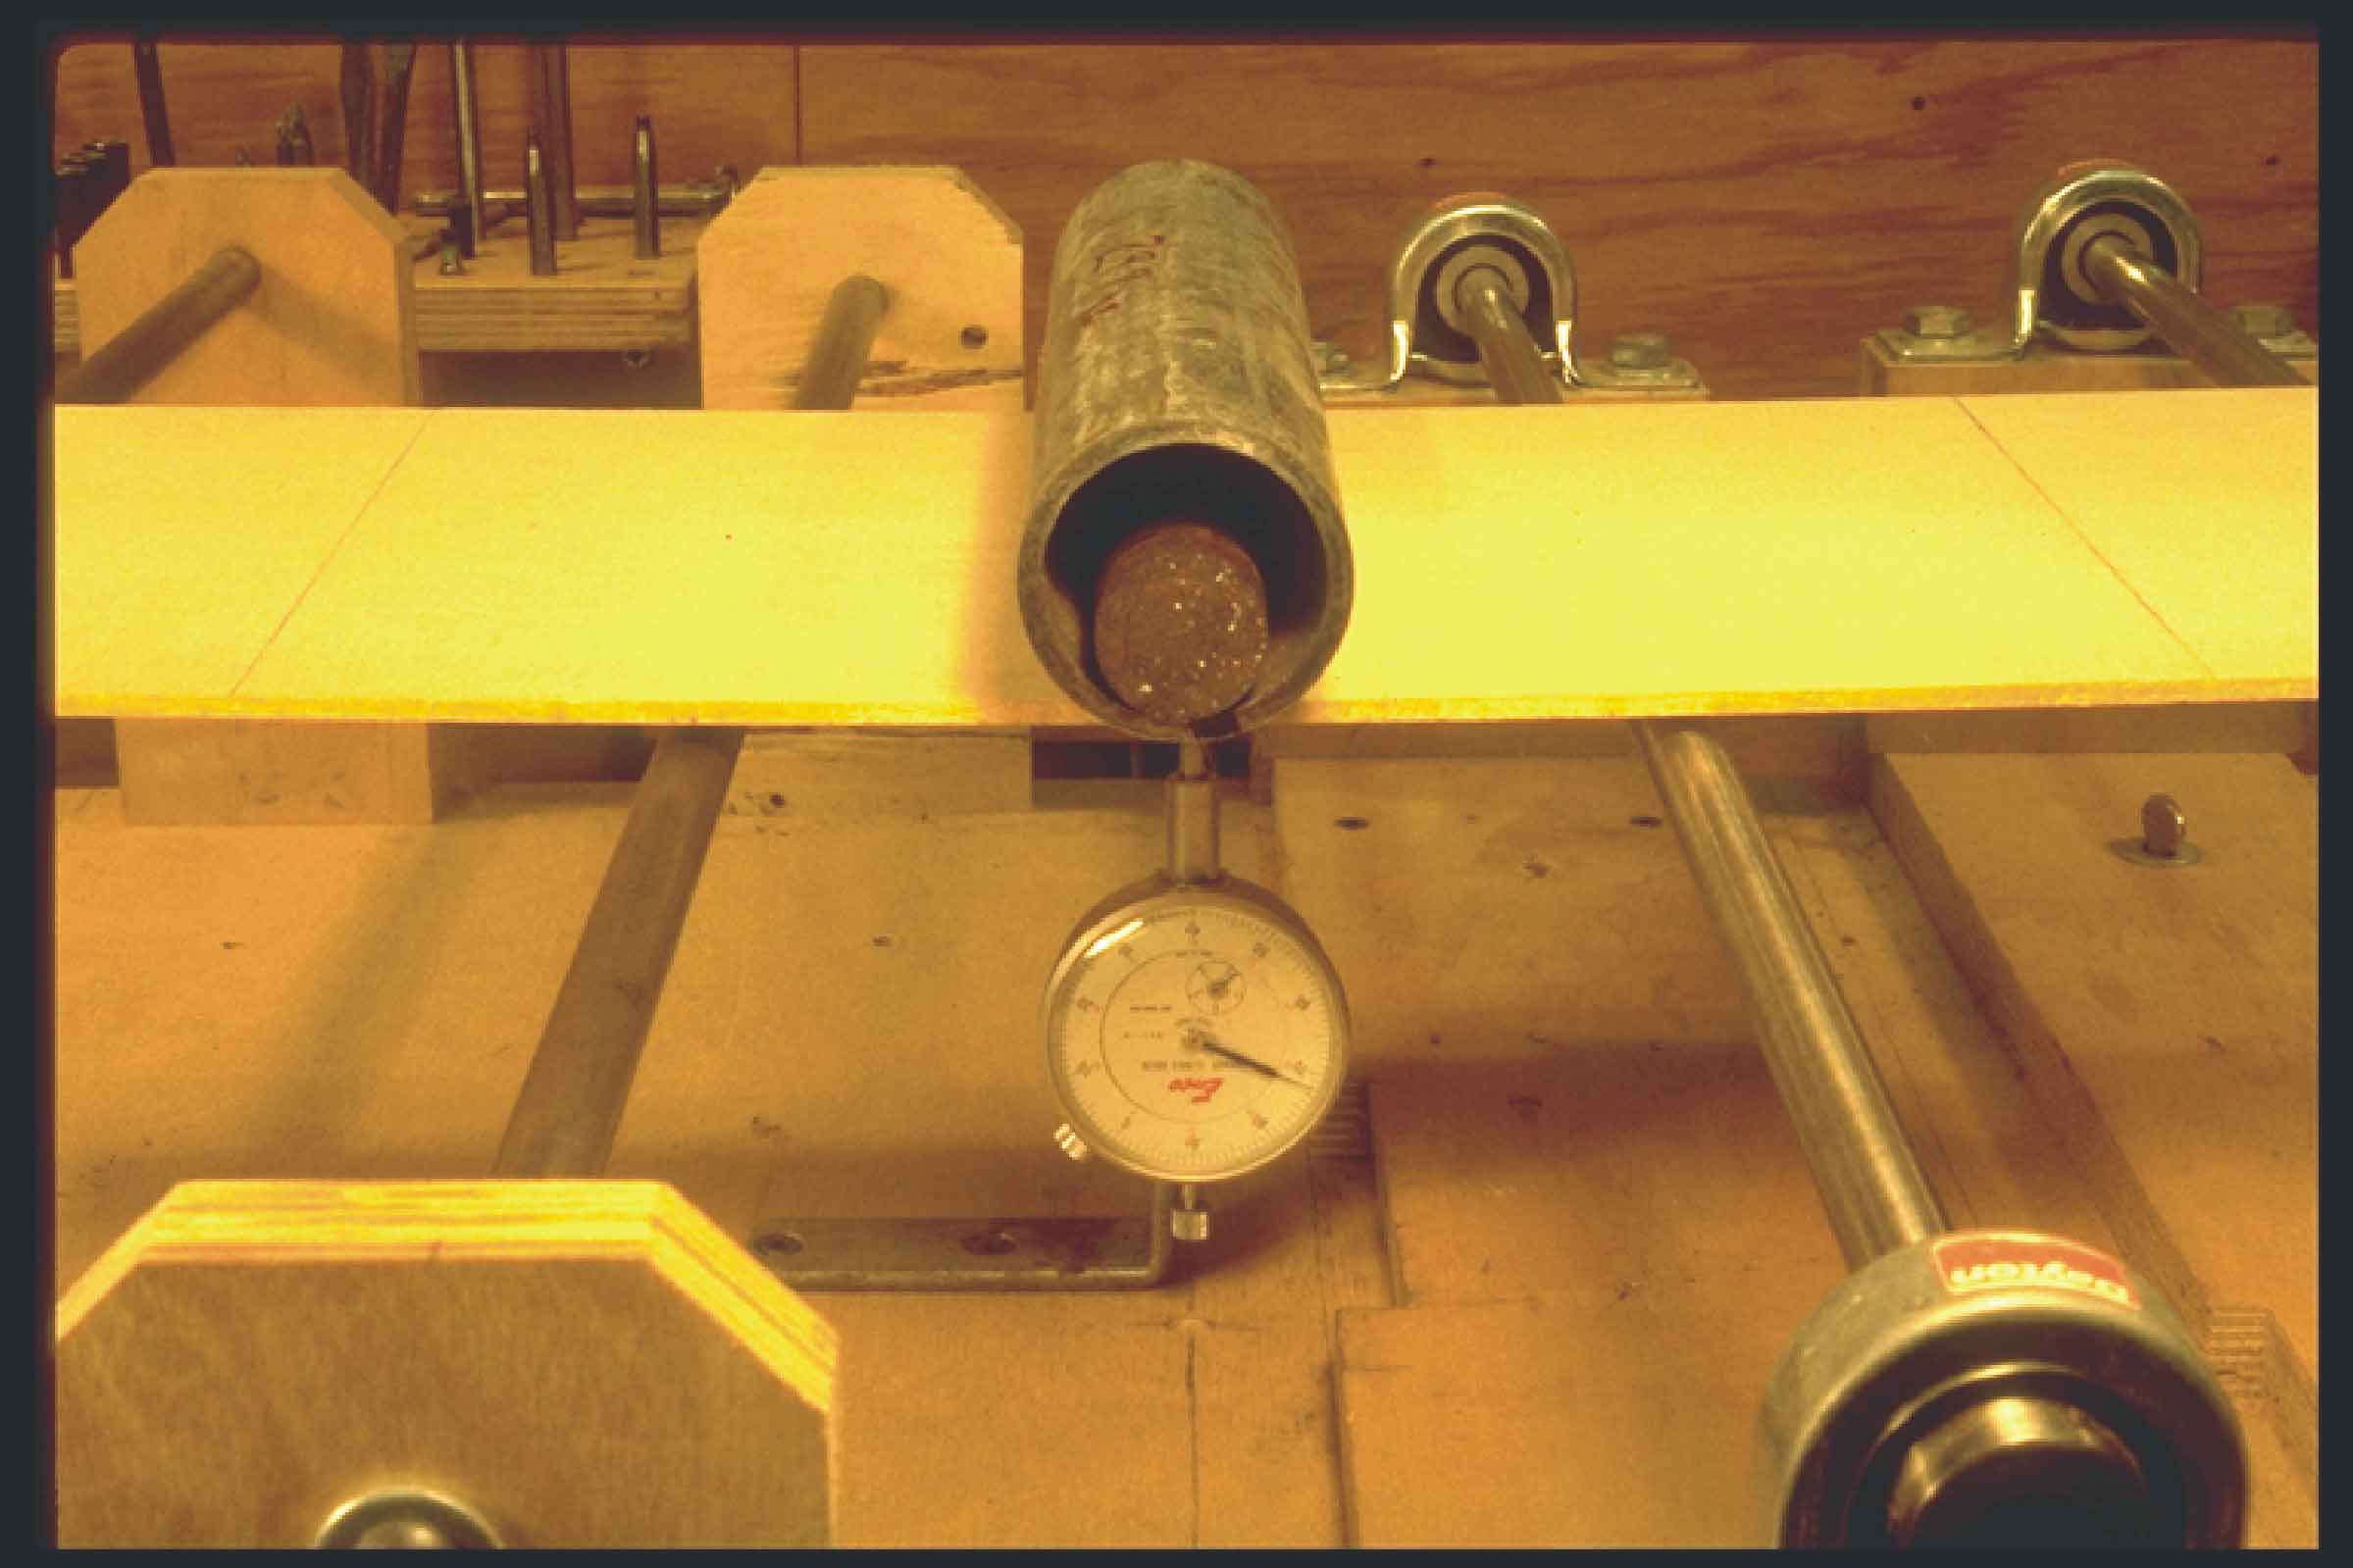
Testing the "Q" of a soundboard ~ a
measure of its sound damping
characteristics. This gives an index to
how efficient this piece of wood will be
at turning string energy into sound,
instead of heat. Higher Q numbers
mean higher efficiency.
measure of its sound damping
characteristics. This gives an index to
how efficient this piece of wood will be
at turning string energy into sound,
instead of heat. Higher Q numbers
mean higher efficiency.
Typical wood test data sheet. The things
that really seem to matter are stiffness to
density ratios, and Q (internal damping).
The Q value provides an accurate
measure of how long the tap-tone lasts.
Higher Q numbers mean longer sustain,
and greater volume.
that really seem to matter are stiffness to
density ratios, and Q (internal damping).
The Q value provides an accurate
measure of how long the tap-tone lasts.
Higher Q numbers mean longer sustain,
and greater volume.
____________________________________
____________________________________
 |
 |